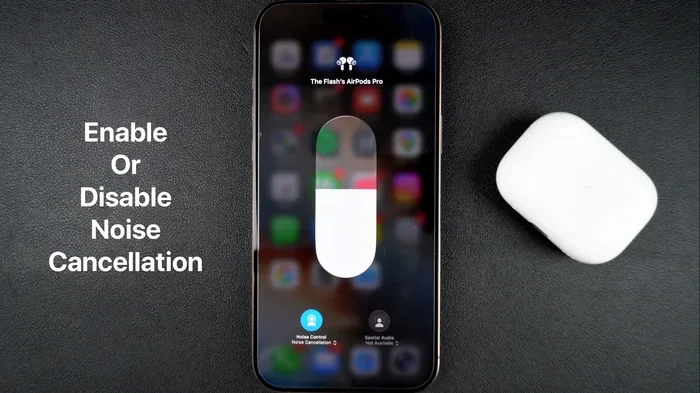
Featured image for AirPods noise cancellation feature
Image source: ioshacker.com
Yes, you can absolutely turn on noise cancelling AirPods, but the method depends on which model you own. AirPods Pro, AirPods Pro 2, and AirPods 4 (with ANC) feature Active Noise Cancellation, while standard AirPods do not. You can activate this feature through your iPhone, iPad, Mac, Apple Watch, or directly by pressing and holding the force sensor on the AirPods stem. The process takes just seconds, and you can switch between noise cancelling, transparency mode, and adaptive audio with ease.
Imagine this: you’re sitting on a noisy airplane, the engine roaring like a jet turbine, babies crying two rows back, and someone clicking their laptop keyboard like they’re typing the next great American novel. You pop in your AirPods, press a tiny button, and suddenly… silence. Beautiful, blissful silence. That’s the magic of noise cancelling, and it’s one of the best features Apple has ever built into their earbuds.
But here’s the thing: not everyone knows how to turn it on, or even which AirPods models support it. Apple has made the process pretty simple, but it can feel confusing if you’ve never done it before. Some people search through their settings for hours, tap random buttons, or even think their AirPods are broken when they’re really just one settings toggle away from audio paradise.
In this complete guide, we’re going to walk through everything you need to know about turning on noise cancelling AirPods. We’ll cover which models support it, all the different ways to activate it, how to troubleshoot common problems, and some expert tips to get the most out of this amazing feature. By the end, you’ll be a noise cancelling ninja, ready to silence the world on demand.
Key Takeaways
- Only Certain Models Support It: AirPods Pro, AirPods Pro 2, and AirPods 4 (ANC) have Active Noise Cancellation. Standard AirPods (1st, 2nd, 3rd generation) do not.
- Multiple Activation Methods: You can turn on noise cancelling through Control Center on iOS, the force sensor on the AirPods stem, your Apple Watch, or Bluetooth settings on Mac.
- Three Listening Modes Available: Most supported models let you switch between Active Noise Cancellation, Transparency Mode, and Adaptive Audio.
- Adaptive Audio is a Game-Changer: Introduced in iOS 17, this feature automatically blends noise cancellation based on your environment.
- Personalized Spatial Audio Matters: For the best noise cancellation experience, setting up personalized spatial audio improves overall sound quality.
- Battery Drain is Real: Using noise cancellation reduces battery life by roughly 20-30% compared to standard listening mode.
- Troubleshooting is Usually Simple: Most issues stem from outdated software, incorrect settings, or needing to clean the ear tips and microphones.
📑 Table of Contents
- Which AirPods Models Support Noise Cancellation?
- How to Turn On Noise Cancelling on AirPods (Step-by-Step)
- Understanding the Three Listening Modes
- Tips to Get the Best Noise Cancellation Experience
- Troubleshooting Common Noise Cancelling Issues
- Privacy and Safety Considerations
- Conclusion: Embrace the Silence
Which AirPods Models Support Noise Cancellation?
Before we dive into the “how,” let’s tackle the “what” first. Not every pair of AirPods comes with Active Noise Cancellation (ANC). In fact, it’s only available on specific models, and knowing which ones can save you a lot of frustration.
The Full List of Noise Cancelling AirPods
Apple currently offers Active Noise Cancellation on these models:
- AirPods Pro (1st generation) – Released in October 2019, this was Apple’s first noise cancelling AirPods.
- AirPods Pro (2nd generation) – Launched in September 2022 with improved ANC that’s twice as effective as the original.
- AirPods Pro 2 (USB-C) – Released in September 2023, same ANC as the Lightning version.
- AirPods 4 with Active Noise Cancellation – Released in September 2024, this is the first non-Pro AirPods to offer ANC.
- AirPods Max – Apple’s over-ear headphones have always had ANC since their December 2020 launch.
Did You Know? According to Apple, the AirPods Pro 2 can cancel up to twice as much noise as the first generation, thanks to the H2 chip and improved acoustic design.
Models That Do NOT Support Noise Cancellation
Unfortunately, these AirPods don’t have ANC:
- AirPods (1st generation) – Released December 2016
- AirPods (2nd generation) – Released March 2019
- AirPods (3rd generation) – Released October 2021
- AirPods 4 (without ANC) – Released September 2024
If you have standard AirPods, you can still reduce some environmental noise by simply turning up the volume or using well-fitted silicone tips (for third-party accessories). But true Active Noise Cancellation requires one of the models listed above.
How to Turn On Noise Cancelling on AirPods (Step-by-Step)
Now for the fun part: actually turning on this feature. There are several methods depending on which device you’re using. We’ll cover them all so you can pick the one that works best for you.
Visual guide about AirPods noise cancellation feature
Image source: aelftech.com
Method 1: Using the Force Sensor on the AirPods Stem
This is the fastest way to toggle noise cancelling without ever looking at your phone. It’s like having a remote control built right into your ear.
- Make sure your AirPods Pro or AirPods 4 (ANC) are in your ears and connected.
- Locate the flat, slightly indented area on the stem of your AirPods. This is called the force sensor.
- Press and hold the force sensor for about 2-3 seconds.
- You’ll hear a chime indicating the listening mode has changed.
Did You Know? The force sensor on AirPods Pro uses haptic feedback, similar to 3D Touch on older iPhones. It mimics the feeling of pressing a physical button without any actual moving parts.
By default, this gesture cycles between Active Noise Cancellation and Transparency Mode. You can customize which modes it cycles through in your Bluetooth settings.
Method 2: Through Control Center on iPhone or iPad
Your iPhone’s Control Center is like a dashboard for your entire Apple experience. It gives you quick access to all sorts of settings, including noise cancellation.
- Open Control Center by swiping down from the top-right corner of your screen (on iPhone X or later) or swiping up from the bottom (on older iPhones).
- Press and hold (or long-press) the volume slider. This expands the audio controls.
- You’ll see three icons at the bottom: Noise Cancellation, Transparency, and Off (or Adaptive Audio).
- Tap the Noise Cancellation icon (it looks like the AirPods Pro with sound waves).
The change is instant, and you’ll hear a confirmation sound through your AirPods. This method works great when you’re already using your phone and want to make quick adjustments.
Method 3: Through Bluetooth Settings
For more detailed control, you can dive into your Settings app.
- Open the Settings app on your iPhone or iPad.
- Tap “Bluetooth” and find your AirPods in the device list.
- Tap the “i” (information) button next to your AirPods name.
- Scroll down to “Noise Control” and select your preferred mode.
This is also where you can customize the press-and-hold action, rename your AirPods, adjust the microphone settings, and more.
Method 4: From Your Apple Watch
If you’re wearing an Apple Watch, you can control noise cancelling without ever pulling out your phone. Think of your watch as a remote control for your ears.
- While playing audio to your AirPods, press the side button on your Apple Watch to open Control Center.
- Tap the AirPlay icon (it looks like a triangle with circles).
- Scroll to find your AirPods.
- Tap the listening mode you want: Noise Cancellation, Transparency, or Adaptive Audio.
Method 5: On Mac
Using AirPods with your Mac? You can control noise cancelling there too.
- Click the Apple menu and go to “System Settings” (or “System Preferences” on older macOS versions).
- Click “Bluetooth” in the sidebar.
- Find your AirPods and click “Options” or the “i” button.
- Choose your preferred noise control mode.
You can also click the AirPods icon in your Mac’s menu bar and select your listening mode from there.
Understanding the Three Listening Modes
Modern noise cancelling AirPods don’t just give you two options anymore. They offer three distinct listening modes, each designed for different situations. Think of them like three different “lenses” for hearing the world.
Active Noise Cancellation (ANC)
This is the main event. ANC uses tiny microphones to detect external sounds, then creates an “anti-noise” sound wave that’s exactly opposite to the unwanted noise. When these two waves meet, they cancel each other out, leaving you with near-silence.
Simple Analogy: Imagine you’re trying to push a heavy box across the floor. Now imagine someone pushing against you with equal force from the other side. The box doesn’t move. That’s essentially how noise cancellation works, but with sound waves instead of physical force.
ANC works best with low, consistent sounds like airplane engines, train rumbling, air conditioners, and office hum. It’s less effective with sudden, sharp noises like someone shouting or a car horn.
Transparency Mode
Transparency Mode is the exact opposite of noise cancellation. Instead of blocking outside sounds, it lets them in. But it doesn’t just open a hole in your ears; it uses the microphones to feed external sounds through your AirPods in a natural way.
This is perfect for situations where you need to hear what’s happening around you, like crossing a street, listening for announcements at an airport, or having a quick conversation without removing your AirPods. It’s like having a window you can open and close on demand.
Adaptive Audio
Introduced in iOS 17, Adaptive Audio is like having a smart assistant for your ears. It automatically blends Active Noise Cancellation and Transparency Mode based on your environment. If you’re sitting in a quiet office, it might let more ambient sound in. If you step into a noisy subway, it cranks up the noise cancellation.
Did You Know? Apple says Adaptive Audio uses machine learning to understand your preferences and surroundings, making roughly 2,000 adjustments per second to deliver the optimal listening experience.
Adaptive Audio also includes Conversation Awareness, which automatically lowers your audio volume and turns on Transparency Mode when you start talking to someone. It’s incredibly intuitive and feels almost magical when you use it for the first time.
Tips to Get the Best Noise Cancellation Experience
Turning on noise cancellation is one thing, but getting the absolute best performance out of it is another. These tips will help you maximize silence when you need it most.
Get the Right Ear Tip Fit
Noise cancellation depends heavily on a good physical seal. If air is leaking around your ear tips, outside noise will sneak in and ruin the effect. AirPods Pro comes with four sizes of silicone tips (XS, S, M, L). Try different sizes to find what creates the best seal in your ears.
You can test the fit using the Ear Tip Fit Test:
- Put your AirPods Pro in your ears.
- Go to Settings > Bluetooth > tap the “i” next to your AirPods.
- Tap “Ear Tip Fit Test” and follow the on-screen instructions.
The test plays a few seconds of music and uses the microphones to determine if you have a good seal. It takes less than a minute and can dramatically improve your experience.
Keep Your AirPods Clean
Dirt, earwax, and debris can clog the microphones and speaker mesh, reducing both audio quality and noise cancellation effectiveness. Apple recommends cleaning your AirPods regularly with a soft, dry, lint-free cloth.
For the ear tips on AirPods Pro, you can remove them and rinse them with water (no soap). Just make sure they’re completely dry before reattaching them.
Pro Tip: Use a soft-bristled brush (like a clean toothbrush) to gently remove debris from the microphone grilles. This small step can make a big difference in performance.
Update Your Software
Apple regularly releases firmware updates that improve noise cancellation algorithms. Make sure your AirPods and connected devices are running the latest software.
To check your AirPods firmware version:
- Connect your AirPods to your iPhone.
- Go to Settings > Bluetooth > tap the “i” next to your AirPods.
- Look at the “Firmware Version” section.
Your iPhone will automatically update AirPods firmware when they’re charging and within Bluetooth range. This usually happens overnight.
Optimize Battery Life
Noise cancellation uses extra processing power, which drains your battery faster. With AirPods Pro 2, you can expect about 6 hours of listening time with ANC on, compared to 7 hours with it off. AirPods 4 (ANC) gets about 5 hours with ANC versus 6 hours without.
To extend battery life:
- Turn off noise cancellation when you don’t need it.
- Use one AirPod at a time (the other charges in the case).
- Keep your charging case topped up.
- Avoid extreme temperatures, which can damage battery health.
Troubleshooting Common Noise Cancelling Issues
Sometimes, things don’t work as expected. Here are the most common problems and how to fix them.
“I Can’t Find the Noise Cancelling Option”
If the noise cancelling option doesn’t appear in your settings, there are a few things to check:
- Make sure you have a supported model: Standard AirPods simply don’t have this feature.
- Check your iOS version: Older iOS versions may not show all listening modes. Update to the latest iOS for full functionality.
- Reconnect your AirPods: Sometimes a fresh connection solves the problem. Go to Settings > Bluetooth, tap the “i” next to your AirPods, and choose “Forget This Device.” Then pair them again.
“Noise Cancelling Sounds Worse Than Before”
If your AirPods used to cancel noise effectively but now don’t, try these solutions:
- Clean the microphones: Blocked mics can’t detect external sounds properly.
- Check your ear tip seal: Worn-out tips lose their grip and create gaps.
- Reset your AirPods: Press and hold the setup button on the case for about 15 seconds until the light flashes amber, then white.
- Update your firmware: Apple may have released a fix for a known issue.
“The Force Sensor Isn’t Working”
If pressing and holding the stem doesn’t change modes:
- Make sure you’re pressing in the right spot: The force sensor is the flat indentation on the stem, not the microphone at the bottom.
- Try a longer press: Some users press too quickly. Hold for a full 2-3 seconds.
- Check your customization settings: Go to Settings > Bluetooth > tap “i” > make sure “Noise Control” is set as the press-and-hold action.
“Noise Cancelling Causes Discomfort”
Some people experience a slight pressure sensation when using ANC, similar to what you feel when an airplane takes off. This is called the “occlusion effect” and is completely normal.
If it bothers you, try these adjustments:
- Switch to Transparency Mode for a while and gradually work your way up to longer ANC sessions.
- Use Adaptive Audio, which can feel less intense than full ANC.
- Try different ear tip sizes to reduce physical pressure.
- Take breaks every hour or so to let your ears “breathe.”
Privacy and Safety Considerations
Noise cancellation is generally safe, but there are a few things to keep in mind, especially in certain situations.
Stay Aware of Your Surroundings
With great silence comes great responsibility. When you’re using noise cancellation, you might not hear important sounds like:
- Traffic when crossing streets
- Emergency vehicle sirens
- Public announcements at airports or train stations
- People calling your name
- Alarms and warnings
Use Transparency Mode or remove one AirPod when you need to stay alert. Adaptive Audio is also a great compromise, as it lets important sounds through automatically.
Hearing Health
Noise cancellation is actually better for your hearing than turning up the volume to drown out background noise. By blocking external sounds, you can listen at lower, safer volumes. The World Health Organization estimates that 1.1 billion young people are at risk of hearing loss from loud music, so ANC is a powerful tool for protecting your ears.
However, avoid using noise cancellation for extended periods at very high volumes. The 60/60 rule is a good guideline: listen at no more than 60% volume for no more than 60 minutes at a time.
Conclusion: Embrace the Silence
Turning on noise cancelling AirPods is one of those small skills that can transform your daily life. Whether you’re commuting on a noisy train, working in a busy office, trying to focus at home with kids running around, or just want to enjoy your music without distractions, this feature is a game-changer.
Remember the key points: only AirPods Pro, AirPods Pro 2, AirPods 4 (ANC), and AirPods Max support Active Noise Cancellation. You can turn it on through the force sensor, Control Center, Bluetooth settings, Apple Watch, or Mac. And with three listening modes, including the brilliant Adaptive Audio, you have more control than ever over what you hear.
Take a few minutes to experiment with different settings, find the right ear tip fit, and customize the controls to match your preferences. Once you do, you’ll wonder how you ever lived without this feature. In a world that’s noisier than ever, the ability to create your own pocket of silence is genuinely priceless.
So go ahead, give it a try. Press and hold that force sensor, tap that icon in Control Center, and discover what your favorite music sounds like when there’s nothing else competing for your attention. Your ears will thank you.
Frequently Asked Questions
Can you turn on noise cancelling on regular AirPods?
No, standard AirPods (1st, 2nd, and 3rd generation) and AirPods 4 (without ANC) do not have Active Noise Cancellation hardware. Only AirPods Pro, AirPods Pro 2, AirPods 4 with ANC, and AirPods Max support this feature. If you want noise cancellation, you’ll need to upgrade to one of these models.
How do I turn on noise cancelling on AirPods Pro?
To turn on noise cancelling on AirPods Pro, press and hold the force sensor on the stem for 2-3 seconds. You can also use Control Center on your iPhone by swiping down, long-pressing the volume slider, and tapping the noise cancellation icon. The change is instant, and you’ll hear a confirmation chime.
Does noise cancellation drain AirPods battery faster?
Yes, using Active Noise Cancellation reduces battery life by approximately 20-30% compared to standard listening mode. AirPods Pro 2 provides about 6 hours with ANC on versus 7 hours with it off. Turning off noise cancellation, using one AirPod at a time, and keeping your case charged can help extend listening time.
Why can’t I find the noise cancelling option on my AirPods?
If you can’t find the noise cancelling option, you likely have a model that doesn’t support ANC, such as standard AirPods 1-3 or AirPods 4 (without ANC). If you have a supported model, try updating your iOS software, reconnecting your AirPods, or checking that the feature is enabled in your Bluetooth settings.
Is noise cancelling bad for your ears?
No, noise cancelling is not bad for your ears and is actually safer than turning up the volume to block out external sounds. Some people experience a slight pressure sensation, but this is harmless. For best practices, take breaks every hour, use Transparency Mode when you need awareness, and follow the 60/60 rule for volume and listening duration.
Can I use noise cancelling on AirPods with Android phones?
Yes, AirPods Pro and other ANC models work with Android devices via Bluetooth, and the noise cancellation will function automatically. However, you won’t be able to customize settings, switch listening modes, or check battery status without an Apple device. You’ll need to use the force sensor to toggle between modes, but Adaptive Audio and other smart features require iOS.